I came across this utility called Duplicity couple of days ago and found it to be very useful. I’ll use this little post to write about what it is and how can it be used to create encrypted backups of not so frequently accessed data on servers that you do not trust. If you only care about the tool, jump to the Usage section.
Use Case
I was working on a little project that involved setting RAID 1 using some spare 500 gig drives and Raspberry Pi as the raid controller. My problem was that I only had two drives, say A and B, and I needed to backup the data on one of the drives (say A) before setting up the raid in case something breaks. I tried to use a friend’s external hard disk but didn’t succeed getting it to work. Finally, I did find another hard disk (say C) in the ‘trash’ laptop a friend of mine gave me. So now I could get the data off the primary disk (A) onto this new disk (C), and I did manage to succeed in that. But this exposed a deeper question of how am I supposed to take care of around 400 GB of backup data, and is having a single copy of it even safe. Of course not.
If you remember my NextCloud solution on DigitalOcean, that worked great as a lightweight cloud, for easy backups of current set of camera pictures and maybe contacts and such. But when it comes to archiving data, DigitalOcean would get a bit too expensive (~USD 10 for 100GB and so on with their block storage). However, their object store was relatively cheap and costed around USD 5 for 250GB of data per month. I needed something like this.
The second problem was speed of upload. I own a modest 2.5Mbps connection, so uploading data off my Internet was out of question. Since I had Google Peering, I could make use of that. I looked up Google Cloud’s solutions and found Google Cloud Storage, which was AWS S3 like object store. They also offered USD 300 free credits to begin with for a year, so I decided to test it out. It worked great, and I got transfer speeds in excess of 24Mbps, which is what Google Peering does.
The last hurdle was finding an automated script to manage sync. I was already a huge fan of rsync and was searching for a way of doing incremental backups (although not strictly required for archiving data) while doing some sort of encryption as well. That is where Duplicity came in.
Enter Duplicity
Duplicity is a tool that uses rsync algorithm for incremental bandwidth efficient backups that are compressed into tarballs and encrypted with GPG. The tool supports a wide range of servers and protocols, and will work with anything from AWS S3, Google Drive/Cloud to WebDAV or plain SSH. In the typical *nix fashion, it does a little thing well and the use cases are only limited to your creativity.
Usage
The setup requires you to install Google Cloud SDK and Python 2’s Boto that will serve as an interface to Google Cloud Storage. Then go ahead, sign up with Google Cloud if you haven’t already and set up a new cloud storage project (say my_backup). Make sure you enable Interoperable Access in /project/settings/interoperability and create a new access-key/secret-key pair. You’ll need to copy these into the ~/.boto config file under gs_access_key_id and gs_secret_access_key respectively.
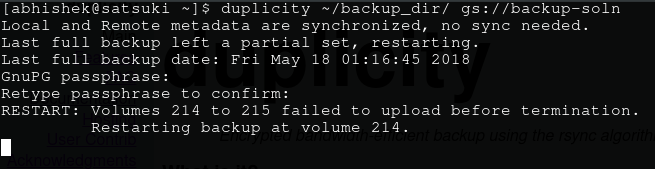
The last step is to test drive the entire setup. Create a directory with a couple of sample files (probably a slightly large video file as well), and run duplicity with the following command.
$ duplicity ~/backup_directory gs://my_backup
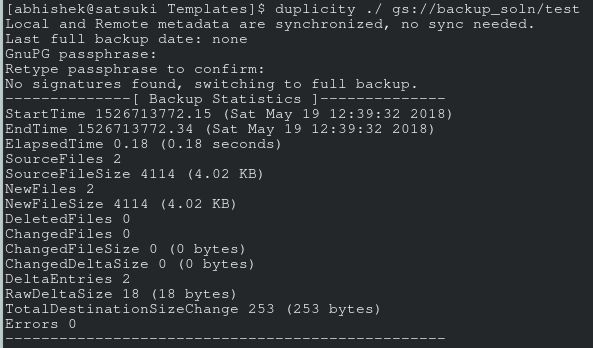
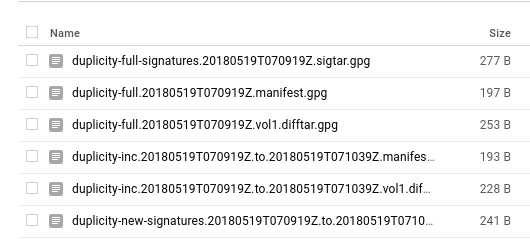
Enter the password when prompted. If all goes well, you’ll see some transfer stats after the command finishes execution (time taken depending on your transfer speed etc), and in your GC console under your storage project’s browser, you’ll see something like in the following image (of course, not a hundred difftars like mine. I’m in the process of backing up my archive).

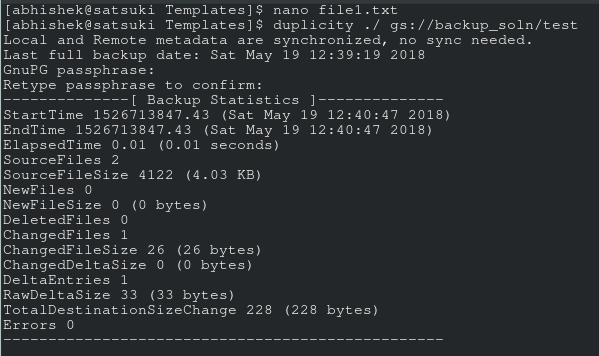
If you do, then congrats! Those are the encrypted tar volumes of your data. Now just to be sure, make a little change in one of the files and run that command again. You’ll see that this time it takes almost no time, and if you refresh the GC storage’s browser, you’ll see couple of new files over there. Those are I believe the diff files.
To recover the archived files, just do a reverse of the command above and you’ll all your files magically in the ~/backup_directory (after you enter the correct password, that is).
$ duplicity gs://my_backup ~/backup_directory
The next step after the initial backup would to be to run this command every hour or so, so that regular backups of our directory keeps happening. I haven’t tested it yet but something like
0 * * * * duplicity /home/abhishek/backup_dir gs://backup_dir >> /dev/null
should do the trick.
If you found this article interesting, make sure you read up more about Duplicity on their webpage and in the man pages. There are tonnes of config options. Thank you for reading!